
Email Distribution
Distribute news releases via email to your targeted media lists.
- How do I distribute via email?
- What if I need to edit my message or re-schedule?
- How does Agility handle duplicate contacts?
- How do I check the status of a press release I just sent via email?
- How do I access my email distribution reports?
- How do I know how many emails I have used?
- What happens when I request more email recipients?
How do I distribute via email?
Use the Agility Email Distribution option, which will take you step-by-step through creating a custom-built message for any number of your targeted lists. You can customize the message, select the time for distribution, and see an index of past distributions, all from within your Agility account.
To set up an Email Distribution, click Distribute in the top navigation bar.
Step 1: Decide who you’re sending your email to by doing the following:
- Select whichever list(s) you want to send your message to; you can also select from any of your saved searches
- Choose to include additional email addresses, such as yours or anyone who is not on your list(s). Note: you may have additional email addresses already pre-set in your Preferences.
Click “Next Step” at the bottom of the screen.

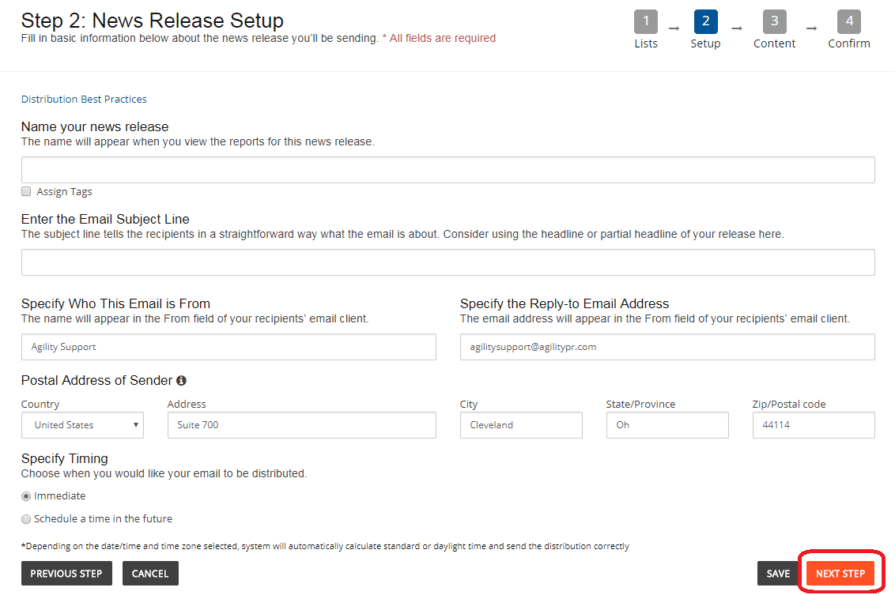
Step 2: Set up the email by filling in the following:
- Name – identify this distribution; the name will only appear in your Agility account, and is used to help you keep track of the different releases you send for reporting purposes
- Subject – create your own attention-getting subject line, or use the headline of the release
- Specify who this email is from – the email address that gets shown to recipients to indicate who the message is from
- Specify the reply-to email address – it can be the same or different than the “from” address in the above field; use an address that you want all responses to go to
- Specify timing – choose to send your message immediately or schedule it for a future date/time. Once you click “Schedule a time in the future,” options for entering the time, date, and time zone will appear, and you can even save the time zone as your default selection moving forward. If you schedule a message to go out at a time in the future, it will be listed on the main Distribution screen as “Pending.”
Click “Next Step” at the bottom. Or click “Save” and your work will be saved as a draft (more about checking the status of a press release below).
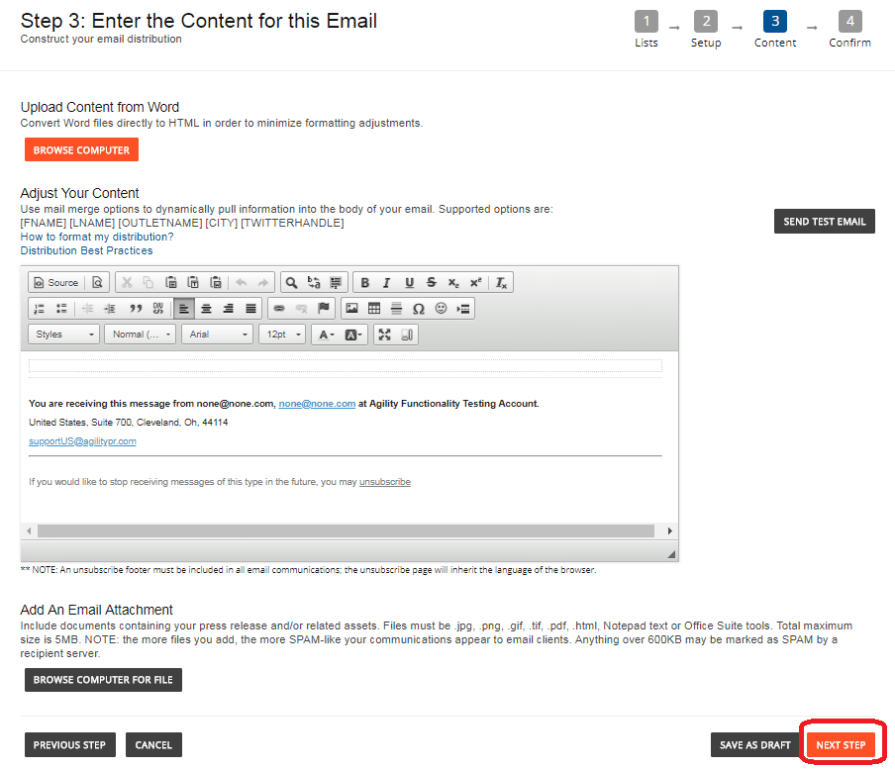
Step 3: Enter the content for your message by doing the following:
- Upload any files or assets related to your press release by clicking “Choose File.” Acceptable file formats include Microsoft Office suite files, JPG, PNG, GIF, TIF, PDF, Notepad Text and HTML. Make sure to follow the maximum size specifications that are noted (2.5 MB per attachment). Note: you can insert more than one image using the in-line image tool. However, we don’t suggest it as when there are more images, the email becomes more difficult to format.
- Enter both your personalized message to your list recipients AND the body of your press release in the “Enter the Email Body” section. You can also paste from a Word doc using this icon.
- To personalize your message, you can address each recipient by name by adding the following tags to the beginning of your message:
[FNAME] – will automatically insert the first name of each contact
[LNAME] – will automatically insert the last name of each contact - Note: It is important to include the brackets and use all capital letters.
You can also choose to add your own salutation (i.e. Dear, Hello, Hi, Good Morning) before the name tags; for example, if you want to address each contact by their first and last name with the “Dear” salutation, you would enter:
Dear [FNAME] [LNAME],
Once you are done, preview your email by clicking the blue “Preview Email” link at the bottom of the screen. In the window that opens, enter the email address(es) to which you want to send a preview of the email (separate with a comma if more than one address), then click “Send Test Email”. Recipients should receive the email in a few moments. You can preview your distribution as many times as you need to before sending.
If you are happy with the preview, you can click “Next Step”. If not, edit the email as needed.
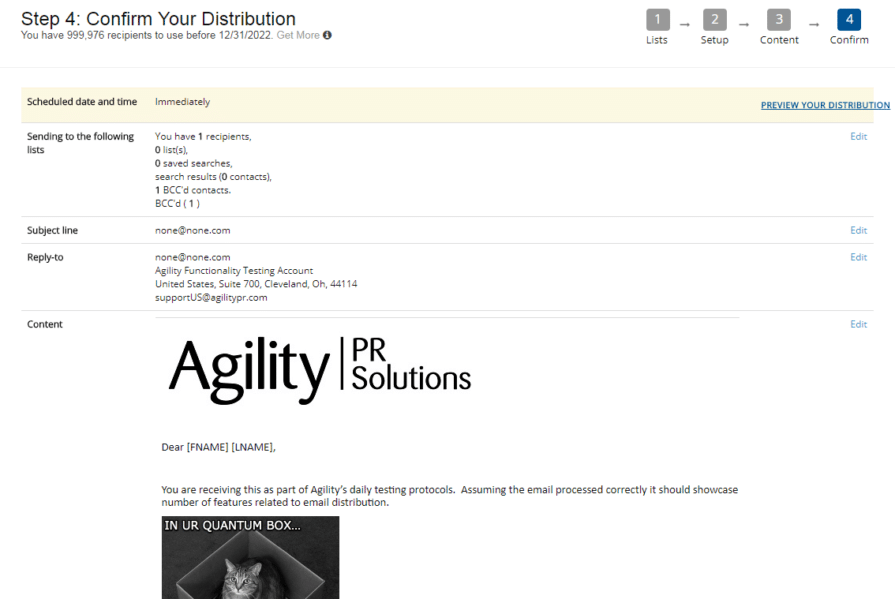
Step 4: Confirm your email details before sending and make any edits by clicking the blue “Edit” link to the right of each field.
You can also include the email addresses of anyone who should receive notification once the email distribution has been sent.
If ready to submit, click “Submit.” Notice the re-confirmation of the time and date if you scheduled the email to go out at a future time.
What if I need to edit my message or re-schedule?
To edit: go to Manage in the top navigation bar and click Email Distribution. Find the scheduled distribution in question and under the Actions column, click “Edit”. This will revert the order back to a draft status and bring you back over to the distribution setup to many any appropriate amendments that you may need to make for the order. Once you are done you’ll resubmit the order as you previously did before.
To cancel: go to Manage in the top navigation bar and click Email Distribution. Find the scheduled distribution in question and under the Actions column, click “Cancel.” After confirming the request you may need to refresh the page before the order list disappears from view.
How does Agility handle duplicate contacts?
When sending an email distribution to more than one of your Agility media lists, the system automatically recognizes any duplicate contacts and will not send to them more than once. Learn more about creating targeted media lists.
How do I check the status of a press release I just sent via email?
Once you submit your email, go to Manage in the top navigation bar and click Email Distributions. Find the distribution in question and check the Status column.
How do I access my email distribution reports?
Each Agility email distribution includes a report that provides you with statistics on the delivery of the email.
To view the reports, go to Measure in the top navigation bar and click Email Distribution Reports. Learn more about Email Distribution Reports.
How do I know how many emails I have used?
Depending on your subscription level, you have a specific number of available email distribution recipients available to you in a given period of time. For the US, that period of time is a calendar year (Jan 1- Dec 31st). Each year, your total will reset plus any additional emails purchased throughout the year. For EMEA, email limits will coincide with your contract start and end date and therefore will vary widely among users.
For all users, an email counter is available in the email distribution wizard and in Account, under General Preferences. This tells you how many emails you have remaining in your package. If you ever require more, you can easily request an upgrade from the system. If you have questions about the number of emails available to you, please contact support.
What happens when I request more email recipients?
Upon entering the email distribution wizard, you may find that you need to “Get More” email recipient distributions in order to complete the submittal of your distribution. If you are an authorized sender on your account, you’ll click on “Get More” and a modal will be displayed with add-on package options; add-on packages will incur additional fees. Select the total number of additional email distributions you’d like to add to your account, re-confirm your request by using the check box and then “Agree and Continue”.
Once you “Agree and Continue”, a few things happen. First, an email is sent to the support team who will upgrade your account and generate an invoice based on your selection. In situations where the upgrade can not be done immediately, Agility will allow you to continue with a single email communication. You can not send another email communication until your total available email distributions in your counter has been updated to reflect your add-on purchase.
If you are not an authorized sender but need more email distributions to complete an order, you need to reach out to your authorized sender directly so they can request more.
For additional Agility support, please contact us.
